
Overview
This article will cover following objectives i.e.
- How to update ASUS motherboard BIOS using USB BIOS Flashback option?
- How to recover corrupt BIOS during BIOS update?
- How to update BIOS in an environment when you’re not able to get into posting the system and BIOS settings at all?
Steps to perform safe & successful update:
For above all perform the following steps:
- Get a USB drive of no larger than 8 GB to avoid corrupt media.
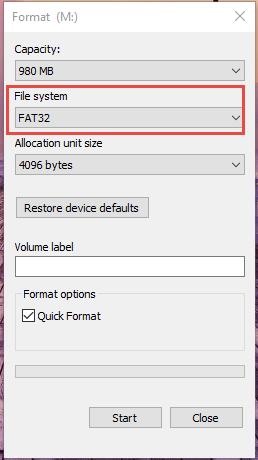
- Format the USB drive on a separate computer or laptop with FAT32 file format system.
- Download the latest BIOS files from the following link after choosing the right motherboard. In this case, I am performing BIOS Update for ASUS MAXIMUS FORMULA VIII.
http://www.asus.com/supportonly/MAXIMUS%20VIII%20FORMULA/HelpDesk_Download/
- Extract the downloaded BIOS file in a separate folder. Now download the BIOS Rename Tool from the following link and it works for most of BIOS files renaming.
https://dl.dropboxusercontent.com/u/65045444/BRenamer.zip
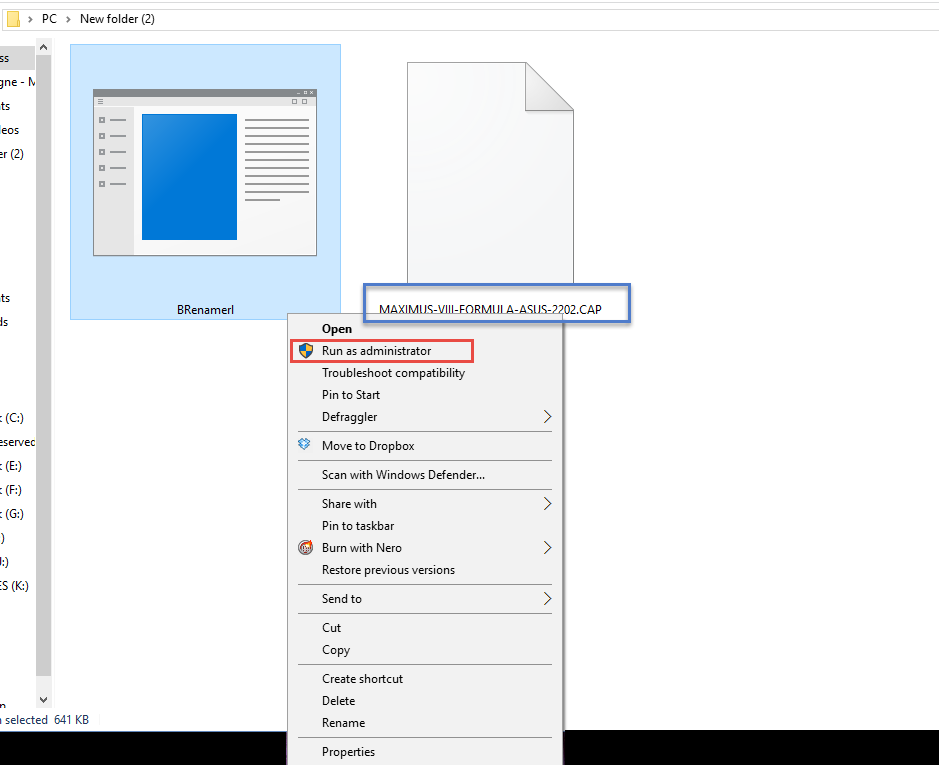
- Extract the downloaded BIOS Renamer file in the same folder where latest BIOS file is placed. Now to rename the BIOS file correctly, right click the BIOS Renamer and Run as Administrator. You will notice that before rename the BIOS file is MAXIMUS-VIII-FORMULA-ASUS-2202 .CAP. To make sure it’s renamed correctly, the renamed file will look like M8F.CAP (M8F indicates that it is MAXIMUS-M, VIII-8, FORMULA-F).
- Once you have renamed it correctly, copy the renamed BIOS file onto your USB Flash drive.
- Before connecting your USB Flash drive to dedicated USB BIOS Flash port of your motherboard, press the CLEAR CMOS button on back of your motherboard (Note: Motherboard should not be in Boot Mode and it is only Powered on)
- After pressing CLEAR CMOS, connect USB to dedicated port only. In this case, I am sharing an image of FORMULA VIII.

Clear CMOS & BIOS Flash Button location - Dedicated USB BIOS port:
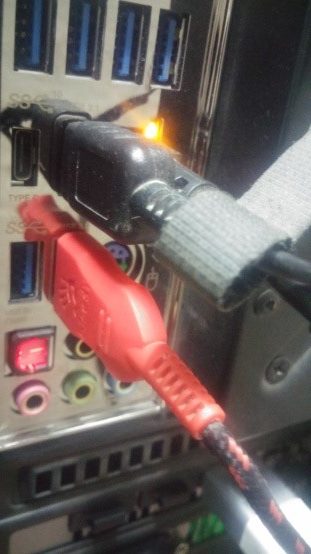
The first port on left. - Now press and hold the BIOS Flash button beside CMOS button for a 3-5 sec until blue light starts to blink. Now let it complete the process which is about 5 to 10 minutes depending upon the file size.
- When BIOS flash blue light stops blinking, then BIOS update process will be completed. Now remove the USB flash drive and BOOT your system.
- On first BOOT it will take some time to get posted on screen, be patient to let the things completed. If you get the system being posted on screen and asking to press F1 to enter Setup. Congratulations!! you’ve successfully Updated/recovered the corrupt BIOS.